You want to sear, you want to brown, you want to savor every bite of kielbasa cooked perfectly in your cast iron skillet.
Cooking kielbasa in a cast iron skillet is all about achieving that crispy, golden exterior while keeping the inside juicy.
It takes more than just heat—it requires the right prep, timing, and technique.
Once you master these steps, you’ll unlock flavors and textures that elevate a simple sausage into a meal worth savoring.
Let’s start with what you need to know before the first sizzle.
Key Takeaways
- Preheat the cast iron skillet over medium heat for about 5 minutes before cooking kielbasa.
- Pat kielbasa dry and slice evenly into rounds or diagonal pieces for uniform cooking and crispiness.
- Add a small amount of high smoke point oil, then place slices in a single layer without overcrowding.
- Sear kielbasa undisturbed until deeply browned on each side, reaching an internal temperature of 160°F (71°C).
- Rest cooked kielbasa briefly before serving to retain juices and enhance flavor.
How to Choose the Best Kielbasa for Your Cast Iron Skillet
When selecting the best kielbasa for your cast iron skillet, what should you look for? First, focus on hull integrity. The sausage casing should be intact and firm, preventing juices from escaping during cooking. This keeps your kielbasa juicy and flavorful.
Next, consider the smoke point of the kielbasa’s fat content. Since cast iron retains heat well, choosing kielbasa with a higher smoke point fat avoids burning and bitterness. Look for varieties labeled as smoked or naturally cured, as these typically handle the skillet’s heat better.
Also, pick sausages with a balanced fat-to-lean ratio, ensuring they crisp nicely without drying out. By paying attention to hull integrity and smoke point, you’ll set yourself up for perfectly cooked kielbasa every time.
How to Prepare Kielbasa Before Cooking
Before you start cooking, make sure you pick fresh kielbasa with a firm texture and rich color. When it comes to slicing, use a sharp knife to cut even pieces. Whether you prefer rounds or diagonal slices, consistency helps them cook evenly.
Taking these simple steps sets the stage for a perfect sear in your cast iron skillet.
Selecting Fresh Kielbasa
How do you pick the freshest kielbasa to guarantee your dish turns out flavorful and satisfying? First, look for kielbasa with a firm texture and a natural, slightly glossy casing. Avoid any that feel slimy or have discoloration.
Fresh kielbasa boasts a rich, smoky aroma that hints at the crispy rendering you’ll achieve in your cast iron skillet. Choosing quality sausage ensures even heat distribution during cooking, letting each slice brown perfectly without burning.
Also, check the ingredients list for minimal additives and preservatives; fresher sausage means better flavor and texture. By selecting kielbasa that’s fresh and well-made, you set the foundation for a dish with deliciously crisp edges and juicy, tender bites every time.
Slicing Techniques
Why does slicing your kielbasa the right way matter? Proper slicing ensures even cooking, enhances flavor absorption, and prevents accidents. Before you start, focus on slicing safety by securing your cutting board and maintaining a firm knife grip.
This control keeps your fingers safe and your cuts precise.
Here’s how to prepare your kielbasa:
Slice diagonally for larger surface area, which crisps beautifully in the skillet.
Cut into uniform rounds about ¼-inch thick to cook evenly.
For stir-fries or casseroles, dice the kielbasa into bite-sized pieces.
Preparing Your Cast Iron Skillet for Cooking Kielbasa
What’s the best way to get your cast iron skillet ready for cooking kielbasa? First, avoid common preheating mistakes like heating the skillet too quickly or unevenly, which can cause sticking or burning. Instead, place your skillet on medium heat and let it warm gradually for about 5 minutes.
While it’s heating, consider your choice of kielbasa, fresh or smoked, and how that influences cooking time and flavor. Next, add a small amount of oil with a high smoke point, like canola or vegetable oil, to prevent sticking and promote even browning.
Swirl the oil to coat the surface thoroughly. Now your skillet is primed to deliver perfectly seared kielbasa with a crispy exterior and juicy interior.
Step-by-Step Guide to Cooking Kielbasa in a Cast Iron Skillet
First, you’ll want to slice the kielbasa into even pieces to ensure they cook evenly. Then, heat your cast iron skillet over medium heat and add a little oil to prevent sticking.
Follow these simple cooking techniques to get a perfectly browned, juicy kielbasa every time.
Preparing Kielbasa Properly
How do you guarantee your kielbasa cooks evenly and stays juicy? It starts with proper preparation, debunking common preseasoning myths and understanding casing debates. First, resist the urge to over-preseason; kielbasa is already flavorful and too much salt or spice can overpower it.
Second, decide on casing: natural casings add snap and texture, while synthetic casings are easier to handle and cook more evenly. Third, before cooking, gently prick the sausage with a fork to prevent bursting but avoid piercing too much, which can dry it out.
To prepare kielbasa properly:
- Let it come to room temperature for even cooking
- Pat dry to remove excess moisture
- Slice or leave whole based on your recipe
These steps set the stage for perfect kielbasa in your cast iron skillet.
Cooking Techniques in Skillet
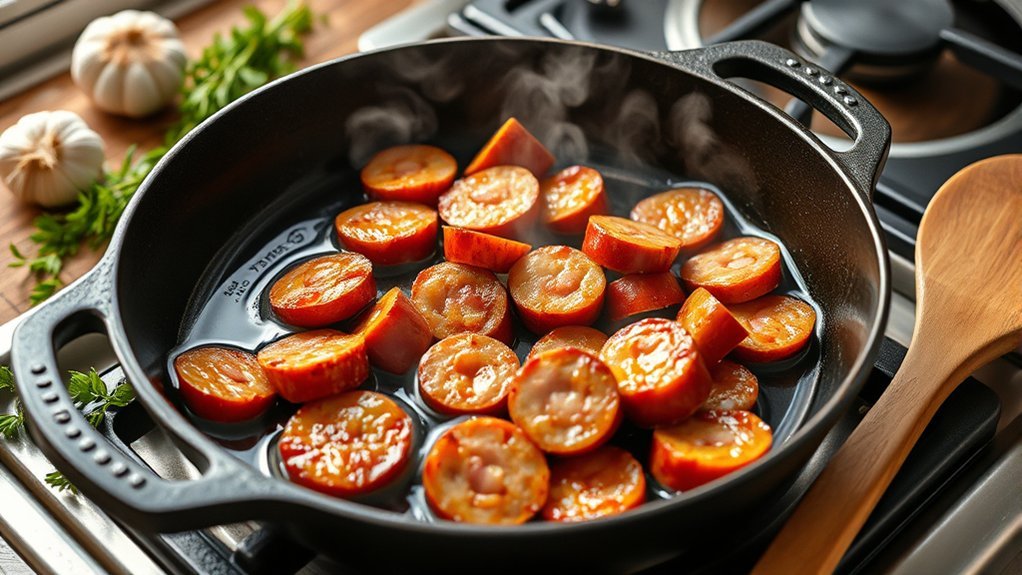
A hot cast iron skillet is your best ally for cooking kielbasa to perfection. Start by heating the skillet over medium heat until it’s shimmering. Add the kielbasa slices in a single layer, allowing them to sear without overcrowding.
This creates a beautiful caramelized crust. As the sausage cooks, apply spice layering by sprinkling your chosen seasonings gradually, enhancing depth without overpowering the natural flavor. Turn the kielbasa to brown all sides evenly.
To achieve irresistible smoke fusion, slightly increase the heat for the last minute, letting the smoke infuse the meat. Remove the kielbasa once it’s golden and sizzling, resting briefly before serving.
This method guarantees juicy, flavorful kielbasa with a perfect balance of spice and smoky richness every time.
How to Tell When Your Kielbasa Is Done
Listen closely to the sizzle and watch the color transform as your kielbasa cooks in the cast iron skillet. Knowing when it’s done isn’t about guessing or relying on some unused topic or irrelevant concept. Instead, focus on these clear signs:
Listen closely to the sizzle and watch the color transform as your kielbasa cooks perfectly.
- The kielbasa’s skin turns a deep golden brown with slight crisping.
- Juices bubble out when you gently press or pierce the sausage.
- The internal temperature hits 160°F (71°C) on a meat thermometer.
Avoid relying on “time alone” or outdated ideas; these indicators ensure your kielbasa is safe and perfectly cooked. Paying attention to these cues helps you serve kielbasa that’s juicy and flavorful without any guesswork.
How to Get Crispy, Juicy Kielbasa Every Time
To get that perfect crispy, juicy kielbasa, start by preheating your cast iron skillet until it’s hot but not smoking. Slice your kielbasa at a slight angle to increase the surface area, which helps it brown evenly and lock in juices.
With these simple steps, you’ll create a deliciously crisp exterior and tender inside every time.
Proper Skillet Preheating
How do you achieve that perfect balance of crispy exterior and juicy interior when cooking kielbasa in a cast iron skillet? It all starts with proper skillet preheating. Skillet care is essential. Never rush this step. A cold pan leads to soggy kielbasa and reinforces common kielbasa myths about frying failures.
To nail the preheat:
- Warm your skillet over medium heat for 5 minutes to ensure even temperature.
- Test by flicking a drop of water; it should dance and evaporate immediately.
- Add a small amount of oil and let it shimmer without smoking before placing the kielbasa.
This method seals in juices while creating that irresistible crust. Mastering preheating turns cooking into an art, proving those myths wrong every time you cook.
Optimal Slicing Techniques
Why does the way you slice kielbasa make all the difference in achieving that perfect crisp outside and juicy inside? It’s all about maximizing surface area while keeping the meat intact. Slice your kielbasa into ½-inch thick rounds or diagonal cuts. This exposes more edges to the heat, giving you that irresistible crispy texture.
Avoid cutting too thin; otherwise, the sausage dries out. Before cooking, sprinkle freshly ground pepper and a touch of garlic grinding over the slices to boost flavor. These seasonings cling better on thicker cuts, infusing every bite.
When you place the slices in your preheated cast iron skillet, let them sear undisturbed for a few minutes. This technique locks in juices and creates that mouthwatering contrast between crispy skin and juicy interior every time.
Flavor Boosters to Try When Cooking Kielbasa
What can you add to your kielbasa to make every bite burst with flavor? Using the right flavor boosters can elevate your dish instantly. Here are some cooking tips to enhance your kielbasa when cooking in a cast iron skillet:
Caramelized onions and garlic: Sauté them first to infuse a sweet, savory depth that complements the smoky sausage.
Smoked paprika or chili flakes: Sprinkle for a subtle heat and smoky undertone that intensifies the kielbasa’s natural flavors.
Fresh herbs like thyme or rosemary: Add towards the end for a fragrant, fresh finish that brightens the dish.
Experiment with these flavor boosters to customize your kielbasa experience and impress your taste buds every time you cook.
Easy Sides to Serve With Cast Iron Skillet Kielbasa
Looking to round out your kielbasa meal with minimal effort? Pair your cast iron skillet kielbasa with simple, tasty sides that complement its smoky flavor. Roasted potatoes tossed with fresh herbs work perfectly. Just chop, season, and let them crisp in the oven while you focus on the main dish.
A fresh tomato salad adds brightness. If you’ve been planting tomatoes, this is the perfect time to harvest ripe ones for a quick, tangy side. For a cozy touch, brew coffee and enjoy it alongside your meal to enhance the hearty experience.
Steamed green beans or sautéed cabbage also make easy, nutritious companions. These sides don’t just save time; they elevate your kielbasa dinner effortlessly, making every bite satisfying and well-rounded.
How to Store and Reheat Leftover Kielbasa Safely
When should you stash your leftover kielbasa to preserve its smoky flavor and juicy texture intact? Ideally, refrigerate it within two hours of cooking to ensure storage safety. Wrap the kielbasa tightly in foil or place it in an airtight container to lock in moisture and flavor.
Follow these reheating guidelines to enjoy your leftovers safely and tastily:
- Reheat in a skillet over medium heat, turning frequently to warm evenly without drying out.
- Use a microwave on medium power, covered with a damp paper towel to retain moisture.
- Avoid reheating multiple times; only reheat what you’ll eat to prevent spoilage.
Mistakes to Avoid When Cooking Kielbasa
How can you guarantee your kielbasa turns out perfectly every time? First, avoid overcrowding the cast iron skillet. Give each sausage room to brown evenly and develop those beautiful grill marks.
Resist the urge to poke or slice the kielbasa before cooking. That lets juices escape, drying out the meat. If you’re using beef substitutes, remember they often cook faster and require gentler heat to avoid burning.
Don’t rush the process by cooking on too high heat; medium heat lets the sausage cook through while crisping the outside. Lastly, don’t skip resting the kielbasa for a few minutes after cooking. This helps juices redistribute, keeping each bite juicy and flavorful.
Follow these tips, and your kielbasa will be a cast iron skillet masterpiece every time.
Frequently Asked Questions
Can I Cook Kielbasa in a Non-Stick Skillet Instead of Cast Iron?
Yes, you can cook kielbasa in a non-stick skillet. When choosing cooking vessel alternatives, remember skillet material tips: non-stick heats evenly and prevents sticking, but won’t develop the same sear or flavor as cast iron.
Is Kielbasa Gluten-Free or Suitable for Specific Diets?
Kielbasa can be gluten-free, but you’ll want to check labels carefully for gluten-free considerations. For diet-specific options, look for varieties without fillers or additives, ensuring they fit your gluten-free or other dietary needs perfectly.
How Long Does Kielbasa Typically Last in the Refrigerator Unopened?
You’ll find kielbasa storage in the refrigerator keeps it fresh for about two weeks unopened. For best refrigeration longevity, store it tightly sealed and check the expiration date to enjoy that smoky, savory flavor safely.
Can Kielbasa Be Frozen Before or After Cooking?
Like a culinary time traveler, you can freeze kielbasa both before and after cooking. This two word discussion idea, kielbasa storage, ensures flavor and freshness endure.
Just wrap tightly and freeze to savor later without loss.
What Is the Origin or History of Kielbasa Sausage?
You’ll find the history of kielbasa rooted in Poland, where regional variations shape its flavors and shapes. As you explore, you’ll notice each area adds unique spices, making kielbasa a rich, cultural sausage experience.
Conclusion
Now that you’ve mastered cooking kielbasa in your cast iron skillet, imagine this: over 70% of home cooks say a perfectly seared sausage is their go-to comfort food. With your skillet preheated, slices browned to a crispy golden finish, and that juicy, smoky flavor locked in, you’re ready to impress.
Just remember to rest the kielbasa briefly before serving—it’s the secret to juicy, mouthwatering bites every time. Happy cooking!
With these tips, you’ll be a pro at cooking kielbasa in your cast iron skillet in no time.