Oiling your skillet properly can make a significant difference in how it performs and lasts over time.
Whether you’re working with cast iron or non-stick skillets, the right technique prevents rust, preserves seasoning, and maintains a smooth cooking surface.
But the process varies depending on your skillet type and the kind of oil you use.
Understanding these nuances will help you keep your pans in top condition and ready for every meal.
Proper oiling is essential for extending the life and efficiency of your cookware.
Key Takeaways
- Clean and thoroughly dry the skillet before oiling to prevent rust and residue buildup.
- Choose a high smoke point oil suitable for your skillet type, like flaxseed for cast iron or canola for non-stick.
- Apply a thin, even layer of oil across the entire surface, including edges, avoiding excessive amounts to prevent stickiness.
- Preheat the skillet before oiling to ensure even oil distribution and optimal seasoning results.
- For cast iron, bake the oiled skillet at 375°F for an hour; for non-stick, heat the oiled pan briefly and wipe off excess.
Why Oiling Your Skillet Matters for Cooking and Longevity
Why should you oil your skillet regularly? Proper oil management prevents food from sticking and creates a natural non-stick surface, enhancing your cooking experience. Regular oiling also protects the skillet from moisture, which can cause rust and degrade its quality over time.
By maintaining an even layer of oil, you extend the skillet’s longevity, ensuring it performs well for years.
Oiling your skillet ties directly into kitchen hygiene. A well-oiled surface reduces residue buildup and minimizes the risk of food particles sticking and harboring bacteria. This keeps your cooking environment cleaner and safer.
Consistent oil management not only improves your skillet’s function but also supports a hygienic kitchen, making your cooking both efficient and sanitary.
How to Clean Your Skillet Before Oiling
How do you prepare your skillet to get the best results from oiling? Start by thoroughly cleaning skillet surfaces to remove food residue, grease, and rust. Use hot water and a stiff brush or non-abrasive scrubber. Avoid soap if your skillet is cast iron, as it can strip seasoning.
For stubborn debris, apply coarse salt as a gentle abrasive, then rinse with warm water. Dry the skillet completely with a towel or by heating it briefly on the stove to prevent rust.
After cleaning, skillet surfaces are spotless and dry, you’re ready for oil application. Proper cleaning ensures the oil bonds well, creating a protective, non-stick layer. Skipping this step can lead to uneven seasoning and reduced skillet longevity.
Choosing the Right Oil for Your Skillet Type
Selecting the right oil for your skillet depends largely on the type of pan you have and the cooking tasks you perform. For cast iron, choose oils with high smoke points to build ethereal seasoning layers. Non-stick pans benefit from lighter oils that support culinary emulsions without damaging the coating.
Stainless steel can handle a variety of oils based on flavor preference and cooking temperature.
| Skillet Type | Recommended Oil |
|---|---|
| Cast Iron | Flaxseed, Grapeseed |
| Non-stick | Canola, Avocado |
| Stainless Steel | Olive, Vegetable |
| Carbon Steel | Sunflower, Peanut |
| Ceramic | Light Olive, Safflower |
Pick oils thoughtfully to maintain your skillet’s performance and enhance cooking results.
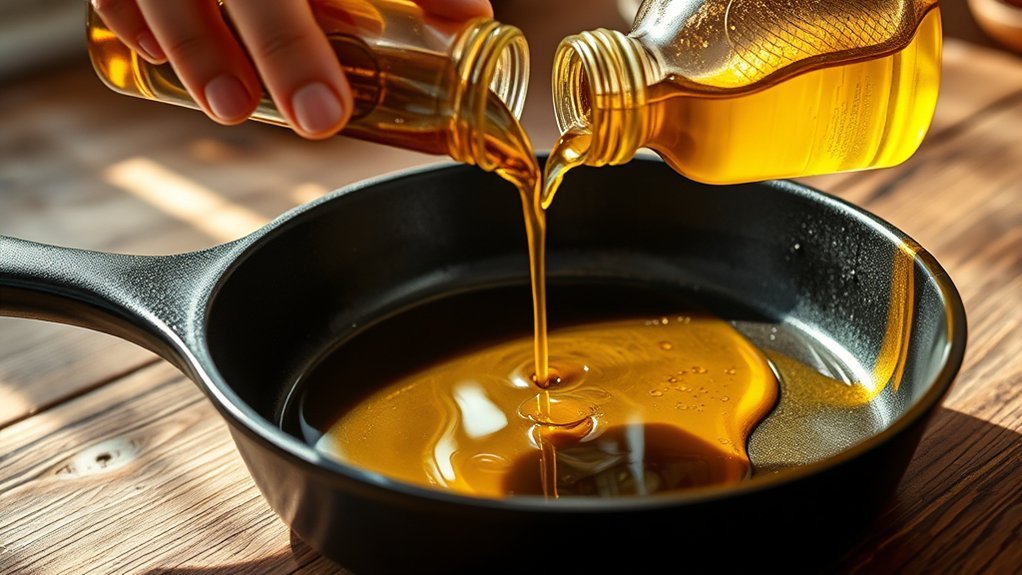
How to Oil Your Cast Iron Skillet Step-by-Step
When should you oil your cast iron skillet to ensure optimal seasoning and longevity? You should oil it immediately after cleaning while it’s still warm. First, dry the skillet thoroughly to prevent rust.
Next, pour a small amount of oil with the right oil viscosity, preferably one that’s thin enough to spread evenly but thick enough to create a durable layer. Use a cloth or paper towel to rub the oil across the entire surface, including the edges. Too much oil can cause sticky buildup, so apply sparingly.
Then, place the skillet upside down in an oven preheated to 375°F (190°C) to allow proper heat transfer, which polymerizes the oil into a hard, protective seasoning. Bake for one hour; then let it cool before storing.
How to Oil Your Non-Stick Skillet for Best Results
Why should you oil your non-stick skillet carefully to maintain its coating and performance? Proper oiling enhances nonstick durability by preventing food from sticking and protecting the surface from damage.
Start by heating the skillet over medium heat. Monitor the oil temperature closely. Avoid overheating, as excessive heat can degrade the nonstick coating.
Begin by warming your skillet on medium heat, carefully watching the oil to prevent coating damage.
Once warm, apply a thin, even layer of high-smoke-point oil using a paper towel or brush. This thin layer ensures optimal cooking without buildup.
Let the oil heat for about a minute, then remove excess to prevent residue. Regularly oiling your non-stick skillet this way preserves its smooth surface, extends its lifespan, and maintains cooking efficiency.
Always focus on moderate oil temperature and minimal application for best results.
Common Oiling Mistakes to Avoid
When oiling your skillet, avoid using too much oil, as it can cause uneven cooking and sticky residue. Make sure you choose the right oil with a high smoke point to prevent burning.
Also, don’t skip preheating your pan, because it helps the oil spread evenly and enhances cooking performance.
Using Too Much Oil
How much oil should you use in your skillet? Using too much oil not only wastes product but also affects cooking performance. Stick to a careful oil measurement, usually just enough to lightly coat the skillet’s surface.
Excess oil pools, causing uneven heating and increasing the risk of reaching the oil’s smoke point prematurely. When oil smokes, it breaks down, imparting off-flavors and harmful compounds to your food.
To avoid this, pour a small amount, then spread it evenly with a paper towel or brush. This technique ensures a non-stick surface without excess oil pooling.
Choosing The Wrong Oil
Choosing the right oil can make all the difference in your skillet’s performance and the flavor of your food. When you pick an oil with a low smoke point, it can burn quickly, producing unpleasant flavors and harmful compounds.
Always check the oil smoke points and select one that suits your cooking temperature. Oils like avocado or refined canola work well for high heat.
Avoid oils that trigger allergen concerns if you or your guests have sensitivities; for example, steer clear of peanut oil if allergies are an issue. Using the wrong oil not only compromises taste but can also damage your skillet’s seasoning over time.
Choose oils thoughtfully to protect both your cookware and the quality of your meals.
Skipping Pan Preheating
Why skip preheating your skillet before oiling? Skipping pan preheating is a common mistake that undermines the entire cooking process. Preheating relevance lies in its ability to ensure even heat distribution, preventing food from sticking and allowing the oil to coat the surface properly.
When you add oil to a cold pan, it pools unevenly, increasing the risk of hot spots and inconsistent cooking. To avoid this, always warm your skillet over medium heat until it reaches the right temperature.
Then, add the oil and let it heat briefly until it shimmers. This method optimizes oil performance, enhances flavor, and prolongs your skillet’s life. Don’t skip this step. Preheating is essential for effective oiling and successful cooking results.
How Often Should You Oil Your Skillet?
When should you oil your skillet to keep it in optimal condition? The oil frequency depends largely on how often you use your skillet. For regular use, oil it after every cleaning to maintain its seasoning and prevent rust.
If you cook less frequently, oil it at least once a month to preserve skillet longevity. Always apply a thin, even layer of oil to the entire surface, including the exterior. This consistent practice maintains the skillet’s non-stick properties and protects the metal.
Avoid excessive oiling, as buildup can become sticky or rancid. Monitoring your skillet’s surface—if it looks dry or dull—is a good indicator it’s time for oiling. Sticking to this oil frequency ensures your skillet stays durable and ready for cooking.
How to Store Your Oiled Skillet Properly
After applying a thin layer of oil to your skillet, proper storage helps maintain its seasoning and prevents rust. When storing skillet, ensure it’s completely cool and dry; moisture invites rust, undoing your oil storage efforts.
Place a paper towel or cloth between the skillet and its lid or other pans to allow airflow and absorb excess oil. Store your skillet in a cool, dry place, away from humidity and temperature fluctuations that can degrade the seasoning.
Avoid stacking heavy items on top, which can damage the surface. Regularly check your skillet during storage for any signs of rust or sticky residue, wiping it down with a lightly oiled cloth if needed.
Following these steps keeps your skillet in top condition, extending its lifespan and performance.
How to Re-Season a Cast Iron Skillet With Oil
To re-season your cast iron skillet effectively, start by selecting an oil with a high smoke point like flaxseed, grapeseed, or vegetable oil. Apply a thin, even layer of oil to the skillet’s surface to avoid sticky buildup.
Then, bake it upside down in the oven at 450°F for an hour to create a durable, non-stick coating.
Choosing The Right Oil
Why does the type of oil you choose matter when re-seasoning a cast iron skillet? Your oil selection directly impacts the durability and effectiveness of the seasoning layer.
Oils with a high smoke point are ideal because they polymerize well under heat, creating a strong, non-stick surface. Avoid oils that smoke too early, as they can produce sticky or uneven coatings.
Flaxseed oil, grapeseed oil, and vegetable oil are popular choices due to their high smoke points and ability to form hard, durable seasoning. While olive oil is common in kitchens, its lower smoke point makes it less suitable for seasoning.
Choose an oil that withstands high temperatures without breaking down, ensuring your cast iron skillet develops a reliable, long-lasting protective layer.
Proper Seasoning Technique
How exactly do you re-season your cast iron skillet with oil to restore its non-stick surface? Understanding seasoning chemistry and heat transfer dynamics is key. Follow these steps:
- Clean and dry thoroughly: Remove any residue, then heat the skillet to evaporate moisture, ensuring optimal heat transfer during seasoning.
- Apply a thin oil layer: Use a high-smoke-point oil, spreading a very thin, even coat inside and out. Excess oil can create sticky buildup, disrupting seasoning chemistry.
- Bake at high temperature: Place the skillet upside down in a preheated oven at 450°F (232°C) for one hour. This allows polymerization of oil molecules, forming a durable, non-stick layer.
Repeat this process periodically to maintain seasoning integrity and enhance heat transfer dynamics for consistent cooking performance.
Tips for Maintaining Your Skillet’s Non-Stick Surface With Oil
Although regular seasoning is essential, applying oil correctly after each use plays a vital role in preserving your skillet’s non-stick surface. After cleaning, dry your skillet thoroughly to prevent rust. Then, apply a thin, even layer of a high-smoke-point oil like flaxseed or canola.
Use a paper towel to spread the oil, ensuring no excess remains. This step supports nonstick maintenance by filling microscopic pores and protecting against moisture.
For ongoing care, avoid harsh detergents and metal utensils, which can damage the surface. Incorporate two word discussion ideas such as “oil layer” and “surface protection” in your routine to remember key maintenance points.
Frequently Asked Questions
Can I Use Olive Oil to Oil My Skillet?
Yes, you can use olive oil to oil your skillet, but be mindful of its lower smoke point. Use extra virgin olive oil for low to medium heat cooking to avoid burning and ensure even seasoning.
Does Oiling Affect the Flavor of My Food?
When you use butter instead of vegetable oil, you’ll notice a richer flavor impact on your steak. Your oil choice directly affects the flavor, so picking neutral oils minimizes flavor changes while others add distinct tastes.
Can I Oil My Skillet in the Dishwasher?
You shouldn’t oil your skillet in the dishwasher because dishwasher safety guidelines advise against it. High temperatures and detergents can break down oil, ruining seasoning.
Instead, oil your skillet after cleaning by hand and drying thoroughly.
Is It Safe to Use Cooking Spray Instead of Oil?
Yes, cooking spray is safe for most skillets, but it can cause buildup over time. You’ll want to contemplate the flavor impact, as sprays often have additives that might alter your dish’s taste slightly.
How Do I Remove Excess Oil From My Skillet?
Like wiping morning dew off leaves, remove excess oil by gently tilting your skillet and using a paper towel to absorb the extra.
This excess oil removal helps maintain perfect skillet seasoning and prevents sticky, uneven surfaces.
Conclusion
Now that you know how to oil your skillet properly, imagine the satisfying sizzle as your food meets a perfectly seasoned surface, smooth and rust-free. By oiling regularly and choosing the right oil, you’re not just preserving your pan—you’re enhancing every meal.
Keep it clean, dry, and lightly coated; your skillet will reward you with longevity and flawless cooking. Trust this simple ritual to transform your kitchen experience, one well-oiled pan at a time.
Mastering how to oil a skillet is the key to maintaining its performance and ensuring delicious results every time you cook.