You might not realize that curing a griddle is more than just applying oil—it’s a precise process that chemically bonds the oil to the metal, creating a durable, non-stick surface.
Skipping proper cleaning or using the wrong oil can lead to uneven seasoning or rust.
Understanding the correct temperature, timing, and oil choice is essential for peak results.
Before you start, it’s important to consider the key steps that guarantee your griddle performs consistently and lasts longer.
Key Takeaways
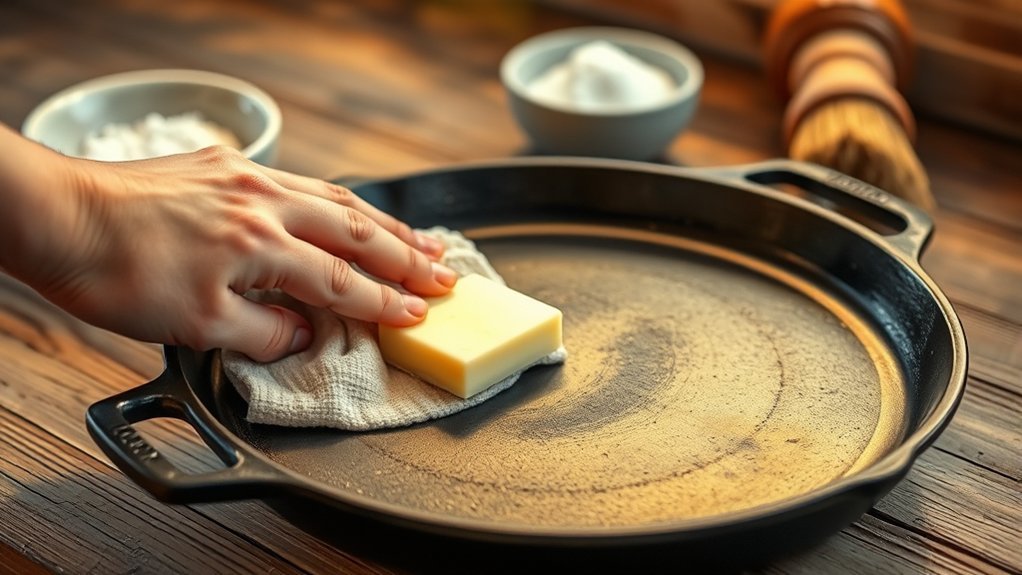
- Thoroughly clean and dry the griddle to remove debris, moisture, and residues before starting the curing process.
- Preheat the griddle to 350°F to 400°F to prepare the surface for oil polymerization.
- Apply a thin, even layer of high smoke point oil like grapeseed or avocado oil across the griddle surface.
- Maintain the seasoning temperature for about one hour to bond the oil into a durable, non-stick layer.
- Repeat the oil application and heating cycle 2 to 3 times for a long-lasting, smooth matte-black seasoning finish.
Why Curing Your Griddle Makes Cooking Better
How exactly does curing your griddle improve your cooking experience? Curing science explains that the process creates a polymerized oil layer, which forms a non-stick, heat-resistant surface.
Curing your griddle forms a polymerized oil layer, creating a durable, non-stick, and heat-resistant cooking surface.
This layer enhances heat distribution and prevents food from adhering, improving cooking consistency. Contrary to seasoning myths, curing isn’t just about adding flavor; it chemically alters the metal surface to protect against rust and degradation.
When you cure your griddle correctly, you optimize thermal transfer, which reduces hotspots and promotes even cooking. This precision translates to better searing and browning, essential for texture and taste.
You’ll notice food releases more easily, making cleanup simpler and extending your griddle’s lifespan. Embracing curing science dispels common misconceptions and guarantees your griddle performs at its best.
How to Clean Your Griddle Before Curing
Before you start curing your griddle, remove any surface debris to ensure a clean base. Use warm soapy water to eliminate grease and residues effectively.
Finally, dry the griddle thoroughly to prevent moisture interference during the curing process.
Remove Surface Debris
Why is removing surface debris essential before curing your griddle? Any residual particles can trap moisture, causing steam buildup during the curing process. This steam interferes with the formation of a uniform seasoning layer, leading to uneven seasoning spots that compromise the griddle’s durability and non-stick properties.
Before you start curing, use a stiff brush or scraper to clear away food remnants, dust, and rust flakes. Removing these contaminants ensures that the seasoning bonds directly to the metal surface without obstruction.
If debris remains, it creates microenvironments where oil can’t polymerize properly, undermining the protective coating. By thoroughly eliminating surface debris, you set the foundation for an even, long-lasting cured surface that enhances your griddle’s performance and lifespan.
Use Warm Soapy Water
Warm soapy water effectively dissolves grease, oils, and remaining residues that a stiff brush might miss. When you clean your griddle, applying warm water mixed with a mild detergent breaks down organic compounds and mineral deposits, facilitating their removal without damaging the surface.
Establishing consistent cleaning habits here ensures that residual contaminants don’t interfere with the curing process, which can affect seasoning adherence and performance. Pay attention to the soap’s compatibility with your griddle material to avoid corrosion or surface degradation.
This step also prepares the surface for the next phase, ensuring oil choices you apply during curing bond optimally. By integrating warm soapy water into your routine, you optimize cleanliness, which directly impacts the durability and effectiveness of your griddle’s seasoning layer.
Dry Thoroughly Before Curing
How thoroughly you dry your griddle directly impacts the success of the curing process. Any residual moisture can cause uneven seasoning, rust formation, or poor oil adherence.
To dry thoroughly, use a clean, lint-free cloth and apply moderate heat to evaporate hidden moisture. Avoid moisture at all costs before curing since it compromises the oil’s ability to polymerize and bond to the surface.
| Drying Method | Efficiency | Risk of Residual Moisture |
|---|---|---|
| Air Drying | Low | High |
| Cloth Wiping | Moderate | Moderate |
| Heat Application | High | Low |
| Combination | Very High | Minimal |
| Compressed Air | Moderate | Low |
Combining heat and wiping ensures you dry thoroughly and avoid moisture, optimizing curing quality.
How to Cure Your Griddle in 5 Easy Steps
When should you begin the curing process for your griddle? Start immediately after drying it thoroughly to lock in the griddle flavor and prevent rust. First, preheat the griddle to a consistent seasoning temperature, usually between 350°F and 400°F, to optimize oil polymerization.
Second, apply a thin, even layer of oil across the surface using a cloth or brush. Third, maintain the seasoning temperature for about an hour to allow the oil to bond with the metal.
Fourth, let the griddle cool naturally to room temperature, ensuring the seasoning sets properly. Finally, repeat this process 2 to 3 times to build a durable, non-stick layer. Following these precise steps establishes a reliable curing foundation, enhancing both performance and longevity.
Best Oils for Curing Your Griddle
Choosing the right oil considerably impacts the effectiveness of your griddle’s curing process. When selecting oils, you need to consider their smoke points and polymerization properties. High smoke point oils like grapeseed or avocado oil withstand the heat without breaking down prematurely, ensuring a durable seasoning layer.
Techniques comparison shows flaxseed oil, despite its low smoke point, creates a hard, resilient coating due to its high polyunsaturated fat content, but requires careful temperature control to avoid smoking excessively. Conversely, oils with lower smoke points can degrade, causing uneven seasoning and sticky residue.
How to Tell When Your Griddle Is Properly Cured
You can tell your griddle is properly cured by examining its surface for a consistent, dark patina without sticky or uneven spots.
Test its nonstick performance by cooking a small amount of food to ensure easy release and minimal residue.
Also, check for even heat distribution by observing uniform cooking across the entire surface.
Visual Surface Appearance
How can you accurately determine if your griddle has cured properly? Focus strictly on the visual surface appearance, avoiding irrelevant discussion or off-topic ideas that don’t impact curing quality.
A correctly cured griddle exhibits a smooth, matte-black finish free from blotchiness or uneven patches. The surface should lack any residual shine or oiliness, which indicate incomplete polymerization.
Look closely for uniform coloration that signals an even seasoning layer. Minor imperfections such as small pits or scratches do not necessarily mean improper curing but watch for dull, grayish spots that suggest undercured areas vulnerable to rust.
Nonstick Performance Test
When can you confidently say your griddle has reached optimal curing through nonstick performance? The answer lies in conducting a systematic nonstick performance test. Begin by heating the griddle to a moderate temperature, then apply a small amount of oil.
Next, place a thin egg layer or pancake batter on the surface. If the food releases effortlessly without sticking or tearing, your curing process is effective. Conversely, any adhesion indicates incomplete polymerization of the seasoning layer.
This two word discussion, “release integrity,” serves as a reliable metric for curing success. Additionally, repeated tests over multiple cooking cycles can reveal whether the nonstick surface maintains consistency.
Even Heat Distribution
Successful nonstick performance signals that the seasoning layer has polymerized adequately, but assessing even heat distribution provides a complementary measure of curing quality. To evaluate evenness, preheat your griddle at a consistent medium setting and observe temperature variations across its surface using an infrared thermometer.
Uniform griddle heat indicates that the seasoning thickness is consistent and the polymerized layer adheres well. If you detect hot spots or cooler areas, the seasoning thickness may be uneven, causing localized heat retention disparities.
These inconsistencies can lead to uneven cooking and potential seasoning degradation. Adjust your curing process by applying thinner, more uniform seasoning layers and regulate heating times to promote molecular bonding.
Monitoring griddle heat distribution ensures that your seasoning layer has cured optimally, providing reliable performance and durability in your cooking surface.
How Often You Should Cure Your Griddle
Why should you cure your griddle regularly? Curing maintains a protective, non-stick layer and prevents rust formation. Addressing frequency questions, you should cure after every 10-15 uses or when the surface shows signs of wear, such as dullness or stickiness. This schedule ensures optimal seasoning integrity.
Incorporate curing into your maintenance routines alongside routine cleaning and drying. Neglecting this can lead to uneven cooking surfaces and accelerated corrosion. The exact frequency depends on usage intensity and food types cooked, but regular curing prevents buildup of residues that degrade performance.
Tips for Maintaining Your Griddle’s Seasoning
How can you preserve the seasoning on your griddle to guarantee consistent performance? First, avoid common seasoning myths such as using soap excessively or overheating, which can degrade the polymerized layer.
Focus on routine cleaning with minimal water and immediate drying to ensure rust prevention. Apply a thin oil layer after each use to maintain the non-stick surface and inhibit oxidation.
| Maintenance Step | Purpose |
|---|---|
| Light Oil Application | Reinforces seasoning layer |
| Gentle Cleaning | Prevents seasoning removal |
| Immediate Drying | Stops rust formation |
Common Griddle Curing Mistakes and How to Fix Them
A frequent challenge in griddle maintenance lies in curing errors that compromise the seasoning’s integrity. One common mistake is applying too much oil, which leaves a sticky residue instead of a hard, protective layer. To fix this, wipe off excess oil before heating.
Another error is insufficient heating time or temperature, preventing proper polymerization of the oil and weakening rust prevention. Ensure you maintain a consistent high heat for the recommended duration.
Additionally, curing in a humid environment can cause uneven seasoning and promote rust. Use a well-ventilated area to avoid moisture accumulation.
Finally, neglecting to clean the griddle thoroughly before curing traps contaminants that degrade the seasoning. By addressing these factors, you’ll establish a durable, rust-resistant surface that enhances your griddle’s longevity.
Troubleshooting Sticky or Rusty Griddles After Curing
Even with proper curing techniques, you might encounter sticky surfaces or rust patches on your griddle. Sticky residue often results from incomplete polymerization of seasoning oils or excess oil left on the surface.
To resolve this, heat the griddle to a high temperature, then wipe with a lint-free cloth to remove the residue. For rust repair, immediately scrub the affected area with a non-abrasive pad to remove oxidation.
Afterward, apply a thin layer of cooking oil and re-season the griddle at high heat to restore the protective layer. Consistent maintenance, including drying thoroughly after cleaning and avoiding prolonged moisture exposure, prevents recurrence.
Frequently Asked Questions
Can I Cure a Griddle on an Electric Stove?
Yes, you can cure a griddle on an electric stove. Use curing methods involving gradual heating and oil application, ensuring even temperature control.
Electric stove feasibility depends on consistent heat distribution to develop a proper seasoning layer.
Is Curing Necessary for Non-Stick Griddles?
You don’t need to season non-stick griddles since their coating prevents polymer buildup and corrosion.
Seasoning is essential for cast iron, but with non-stick surfaces, curing isn’t necessary for effective polymer prevention or longevity.
How Long Does Curing Extend the Griddle’s Lifespan?
Curing markedly extends your griddle’s longevity by enhancing its heat retention and creating a protective seasoning layer.
This process can add years to its lifespan, reducing rust and wear while improving cooking performance consistently over time.
Can I Cure a Griddle Outdoors Over a Campfire?
You absolutely can’t go wrong with campfire curing; outdoor seasoning over an open flame creates intense heat, bonding oil molecules to the surface. Just control temperature spikes and apply thin oil layers for a durable, even non-stick finish.
Does Curing a Griddle Affect Food Flavor?
You’ll notice griddle seasoning creates a polymerized oil layer that reduces sticking and imparts subtle, enhanced flavor. This seasoning layer minimally alters food flavor but improves cooking consistency and prevents metallic taste, positively affecting overall flavor impact.
Conclusion
Curing your griddle transforms it from bare metal to a sleek, resilient cooking surface, like forging a blade with every oil layer bonding perfectly. When you clean, dry, and season it precisely, you create an invisible shield that guarantees even heat and effortless release.
Regular maintenance keeps this coating strong, preventing rust or stickiness. By mastering curing’s technical steps, you gain a durable tool that enhances every meal with consistent, professional results.
In conclusion, understanding how to cure a griddle ensures your cooking surface remains reliable and long-lasting, giving you the best performance every time you cook.