Did you know that properly priming a Blackstone griddle can significantly extend its lifespan and ensure more even cooking? If you skip this essential step, you might experience uneven heating or food sticking to the surface.
Priming isn’t complicated, but it does require the right technique and materials to build a durable, non-stick layer. Before you fire it up, understanding how to prepare and season your griddle will save you time and frustration down the line.
Key Takeaways
- Thoroughly clean the griddle surface with warm, soapy water and scrape off any debris before priming.
- Apply a thin, even layer of high-smoke-point oil like flaxseed or canola to the cool, cleaned surface.
- Heat the griddle to medium-high for 10 minutes, then maintain heat for 15 minutes to polymerize the oil.
- Let the griddle cool for 5 minutes, then wipe off any excess oil with a clean cloth or paper towel.
- Repeat priming every 1-2 months for daily use or immediately after heavy cleaning to maintain nonstick performance.
What Is Priming a Blackstone Griddle?
What exactly does it mean to prime a Blackstone griddle? Priming definition, in this context, refers to the initial process of seasoning and preparing your griddle’s surface before its first use. You’ll apply oil and heat it to create a natural, non-stick coating that protects the metal from rust and guarantees even cooking.
This step is essential because it unlocks major griddle benefits, such as enhanced food release, easier cleaning, and longer lifespan of your Blackstone. By priming, you’re essentially building a protective barrier that improves performance every time you cook.
It’s not just maintenance; it’s the foundation for perfect grilling. Taking the time to prime your griddle properly sets you up for consistent, delicious results down the road.
Why Priming Your Blackstone Griddle Matters
You’ll want to prime your Blackstone griddle to prevent rust from forming and keep the surface smooth and nonstick. Proper priming also helps distribute heat evenly, so your food cooks consistently every time.
Skipping this step can lead to uneven cooking and a shorter lifespan for your griddle.
Preventing Rust Formation
A properly primed Blackstone griddle forms a protective barrier that keeps moisture and air from reaching the metal surface, which is essential to prevent rust. Without this barrier, practical rust can develop quickly, damaging your griddle and shortening its lifespan.
Rust prevention starts with priming, which seals the surface and creates a durable layer. To keep rust at bay, you’ll want to:
- Apply a thin, even coat of oil after cleaning
- Heat the griddle to polymerize the oil, locking it in
- Store your griddle in a dry, covered area
- Avoid leaving water or acidic foods on the surface
- Regularly reapply oil after each use
Following these steps ensures your Blackstone stays rust-free and ready for every cookout.
Enhancing Nonstick Surface
Preventing rust by properly priming your Blackstone griddle also sets the stage for a superior nonstick cooking surface. Many people have priming misconceptions, thinking it’s just about rust prevention, but it’s equally essential for building that natural, durable coating.
When you season the griddle correctly, you create a polymerized oil layer that fills microscopic gaps, reducing food stickiness. This layer improves with each use, making cooking easier and cleanup faster.
Skipping or rushing priming can result in uneven seasoning, causing food to cling and increasing rust risk. So, take your time to prime thoroughly. This initial step guarantees your griddle performs at its best, combining rust prevention with a reliable, enhanced nonstick surface that lasts for many meals to come.
Improving Heat Distribution
How does priming your Blackstone griddle influence the way heat spreads across its surface? Priming is essential because it addresses common priming myths and ensures even heat distribution, preventing heat disparity. Without priming, your griddle may develop hot spots and cold patches, making cooking inconsistent.
When you prime your griddle, you:
- Seal the steel surface, reducing heat loss
- Create a uniform cooking layer that spreads heat evenly
- Minimize warping caused by uneven heating
- Improve fuel efficiency by stabilizing temperature
- Enhance overall cooking performance with consistent heat
Tools and Supplies Needed for Priming
To prime your Blackstone griddle effectively, you’ll need a few essential tools like a scraper, spatula, and a clean cloth. You’ll also want supplies such as high-smoke point oil, like flaxseed or canola, to create a solid seasoning layer.
Having these ready will make the priming process smooth and efficient.
Essential Priming Tools
What tools do you really need to get your Blackstone griddle primed and ready for cooking? Forget common priming myths that say you need fancy gear. What matters is having the right basics to handle oil’s smoke point safely and evenly. Here’s what you’ll want:
- A high-smoke-point cooking oil (like canola or grapeseed)
- A sturdy metal spatula or scraper to spread oil and clean residue
- Heat-resistant gloves to protect your hands from hot surfaces
- A microfiber cloth or paper towels for wiping excess oil
- A reliable propane tank or heat source for consistent heating
With these tools, you’ll control the seasoning process effectively, ensuring your griddle develops a durable, non-stick surface without unnecessary hassle or risk.
Recommended Priming Supplies
Where should you start when gathering supplies to prime your Blackstone griddle? Begin with quality priming brushes. Stiff-bristled ones work best to spread oil evenly across the surface.
Next, consider your oil types carefully; flaxseed oil is popular for creating a durable seasoning layer, but canola or vegetable oil also do the job well. Avoid heavy oils that can gum up the griddle.
Have a clean cloth or paper towels handy to wipe off excess oil after application. You’ll also need a heat-resistant glove to protect your hand while working on a hot surface.
Finally, keep a spray bottle of water nearby to manage flare-ups during the priming process. With these supplies ready, you’ll prime your Blackstone efficiently and effectively.
How to Clean Your Blackstone Griddle Before Priming
Before you start priming your Blackstone griddle, you’ll want to guarantee it’s spotless and free from any protective coatings or residue left from manufacturing. Cleaning thoroughly ensures your griddle will season evenly and helps with rust prevention.
Start by heating the griddle slightly to loosen any debris. Then, follow these steps:
- Scrape off any dirt or residue using a metal spatula.
- Wipe down the surface with a paper towel soaked in warm, soapy water.
- Rinse with clean water and dry completely using a cloth.
- Apply a thin layer of oil to protect the surface from moisture.
- Let the griddle cool fully before moving on to priming.
Step-by-Step Guide to Priming Your Blackstone Griddle
Once your Blackstone griddle is clean and completely cooled, you’re ready to start the priming process, which builds the foundation for a durable, non-stick cooking surface. Begin by turning on the griddle to medium-high heat and let it warm up.
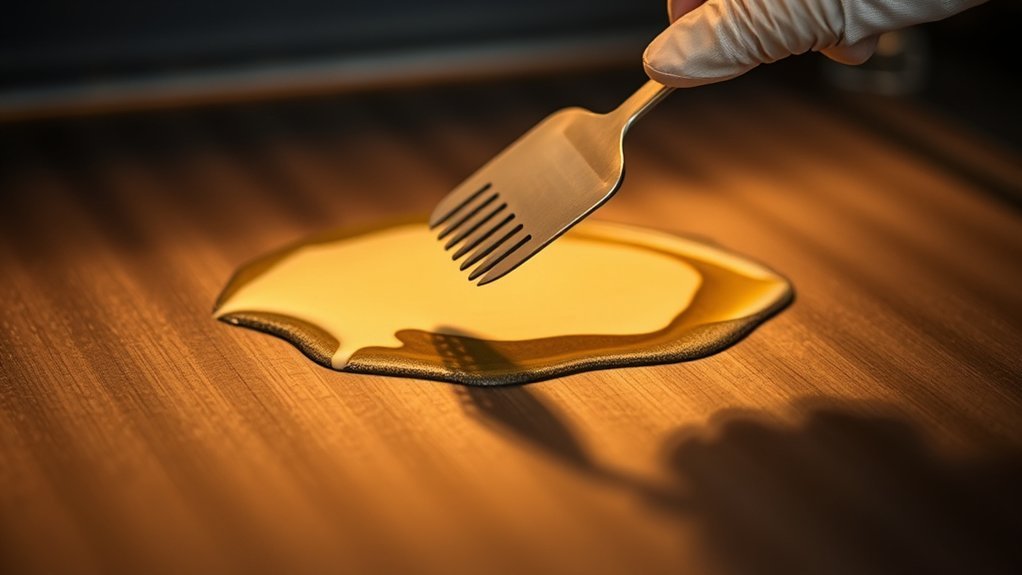
Next, apply a thin, even layer of oil across the entire surface. This step is crucial in the priming steps. Avoid common mistakes like using too much oil, which causes sticky residue, or uneven coverage that leads to patchy seasoning.
Allow the oil to smoke and bond with the metal, then wipe off any excess with a clean cloth. Repeat this heating and wiping cycle two to three times to ensure a solid, protective layer.
Following these priming steps carefully sets you up for long-lasting performance.
How to Apply Oil for the Best Seasoning
How exactly should you apply oil to achieve the best seasoning on your Blackstone griddle? Start by choosing an oil with a high smoke point, like flaxseed or grapeseed, to create a durable, non-stick surface. Apply oil evenly across the surface, avoiding puddles, to ensure consistent seasoning.
Use a clean cloth or paper towel for smooth application, wiping excess oil to prevent sticky buildup. Remember, your seasoning relies on proper cleaning methods before oiling, so a well-maintained surface enhances results. Also, if you’re experimenting with alternative fuels, note how they might affect heat distribution and oil curing.
Follow these tips:
- Preheat griddle to open pores for oil absorption
- Pour a small amount of oil, then spread thinly
- Use circular motions for even coverage
- Wipe away excess oil to prevent stickiness
- Repeat after each cleaning for lasting seasoning
How Long to Heat and Cure Oil on Your Griddle
Why does the time you spend heating and curing oil on your Blackstone griddle matter? Proper oil timing ensures the seasoning bonds well, creating a non-stick surface. Too short, and the oil won’t polymerize; too long, and you risk burning it. Heat duration is key to achieving an even, durable layer.
Here’s a quick guide to heat and cure your griddle oil effectively:
| Heat Duration | Oil Timing |
|---|---|
| 10 minutes | Initial heating |
| 15 minutes | Polymerizing oil |
| 5 minutes | Cooling down |
Start by heating your griddle to medium-high for about 10 minutes. Next, maintain heat for 15 minutes to cure the oil thoroughly. Finally, let it cool for 5 minutes before wiping any excess. This balance optimizes your griddle’s seasoning layer.
Common Mistakes to Avoid When Priming Your Blackstone Griddle
What traps should you avoid when priming your Blackstone griddle? Mastering griddle fundamentals means steering clear of common pitfalls that can ruin your seasoning process. Avoid these mistakes to ensure a smooth prime.gov two word discussion ideas session with your griddle:
- Skipping thorough cleaning before priming, leaving residues behind
- Using too much oil, causing sticky, uneven seasoning
- Heating the griddle unevenly, which leads to patchy curing
- Not allowing enough time for the oil to cure properly
- Applying oil on a cold surface, preventing proper absorption
Tips to Maintain Your Seasoned Griddle Surface
After avoiding common priming mistakes, keeping your Blackstone griddle in top shape becomes much easier. To maintain the seasoned surface, always clean it immediately after use with a scraper and warm water. Avoid soap, which can strip seasoning.
Apply a thin layer of high-smoke point oil to preserve griddle aesthetics and prevent rust. Store your griddle covered in a dry place to protect it from moisture and debris.
For stove safety, never leave the griddle unattended while heating and ensure grease buildup is regularly wiped away to avoid flare-ups. Periodically check for uneven seasoning or rust spots, then reseason those areas promptly.
Following these steps keeps your griddle cooking smoothly and looking great for years to come.
How Often Should You Re-Prime Your Blackstone Griddle?
How often you need to re-prime your Blackstone griddle depends largely on how frequently you use it and how well you maintain the surface.
If you notice food starting to stick or the surface looking dull and uneven, it’s a clear sign your seasoning needs renewing. Paying attention to these cues will help you keep your griddle performing at its best.
Frequency Based On Usage
When should you re-prime your Blackstone griddle to keep it performing at its best? The frequency based on your usage patterns plays a pivotal role. If you cook daily or entertain often, you’ll need to re-prime more frequently to maintain that smooth, non-stick surface. For occasional use, less frequent priming works fine.
Consider these usage-driven guidelines:
- Daily use: re-prime every 1-2 months
- Weekly use: re-prime every 3 months
- Monthly use: re-prime twice a year
- Seasonal or occasional use: once a year
- After heavy cleaning or scraping: re-prime immediately
Signs You Need
Keeping track of your Blackstone griddle’s condition helps you know exactly when it’s time to re-prime. Look for visible rust spots or dull areas where your initial primes have worn off. These are clear signs your griddle needs attention.
Uneven heat distribution is another key indicator; if your food cooks inconsistently, the seasoning layer may be compromised. You should also check after extended storage or heavy cleaning, as these can strip away protective primes and expose the metal to rust.
When you notice these signs, re-priming restores that essential non-stick surface and prevents rust from developing further. Staying proactive ensures your Blackstone griddle performs optimally, maintaining even heat and a smooth cooking surface every time you fire it up.
Frequently Asked Questions
Can I Use Cooking Sprays Instead of Oil for Priming?
You can use cooking sprays as oil substitutes for the priming technique, but be cautious. They often contain additives that might affect seasoning. Using pure oils like canola or flaxseed usually provides better, longer-lasting results.
Is Priming Necessary for Electric Blackstone Griddles?
Think of prime oiling as laying a smooth road for your electric Blackstone griddle. Yes, it’s necessary. It ensures temperature consistency and prevents sticking, helping your griddle perform at its best every time you cook.
What Are the Signs My Griddle Needs Re-Seasoning Beyond Priming?
You’ll notice signs of residue buildup like sticky, uneven surfaces and uneven heating causing hot spots. If food sticks more or the griddle looks patchy, it’s time to clean thoroughly and re-season to restore that smooth, non-stick layer.
Can I Prime My Blackstone Griddle Indoors Safely?
Priming your Blackstone griddle indoors is like dancing in a smoky room. It’s possible but risky.
Prioritize priming safety by ensuring excellent indoor ventilation. Open windows and use fans to keep fumes clear and your space breathable throughout the process.
Does Priming Affect the Taste of Food Cooked on the Griddle?
Yes, priming influences taste by creating a seasoned surface that prevents sticking and adds flavor. Your oil choice matters. Use high-smoke-point oils to avoid off-flavors and enhance your Blackstone griddle’s cooking performance and taste.
Conclusion
Priming your Blackstone griddle is like laying a strong foundation for a culinary masterpiece. By seasoning it properly, you ensure a non-stick surface that cooks evenly and lasts longer.
Remember, consistent care and timely re-priming keep your griddle performing at its best. Follow the steps carefully, avoid common pitfalls, and treat your griddle like a trusted ally in the kitchen.
With patience and practice, you’ll enjoy flawless cooking every time. Proper priming is key to unlocking the full potential of your Blackstone griddle.