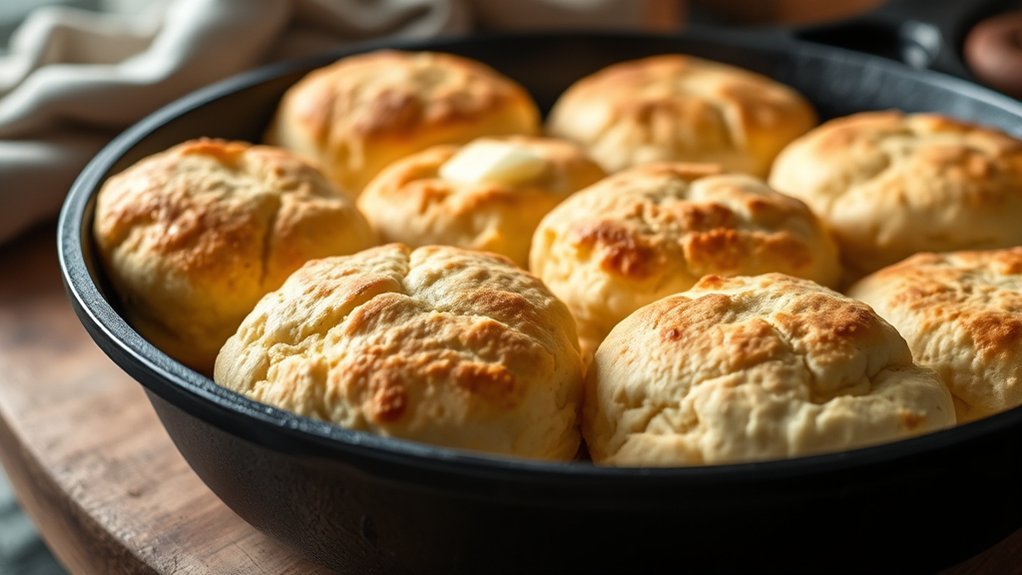
You know how a cast iron skillet can transform a simple steak into something unforgettable? The same magic applies to making biscuits in a cast iron skillet. When you bake them right in that hot, well-seasoned pan, you get a crust that’s crispy and golden, with a tender inside that almost melts.
But nailing the perfect biscuit takes more than just tossing dough in the skillet—you’ve got to get the ingredients, prep, and timing just right. Let’s walk through how to make that happen.
Key Takeaways
- Preheat a cast iron skillet to 400–425°F to ensure even heat and a crispy, golden crust on biscuits.
- Use soft wheat flour, cold flaky butter, buttermilk, baking powder, salt, and sugar to prepare a tender, flavorful dough.
- Pat dough into a rectangle, cut biscuits without twisting, grease the skillet, and arrange biscuits snugly for baking.
- Bake biscuits at 425°F for 12–15 minutes until golden, edges pull away, and a toothpick comes out clean.
- Brush hot biscuits with melted butter after baking for added flavor, shine, and a tender, fluffy texture.
Use a Cast Iron Skillet for Better Biscuits
Why choose a cast iron skillet for your biscuits? Because it’s a game-changer. When you use a cast iron skillet, you get that perfect, even heat that’s hard to replicate with other pans.
This means your biscuits develop a golden crust with a creative texture, crispy outside, tender inside, that’s simply irresistible. Plus, cast iron retains heat like a champ, so every biscuit bakes evenly, locking in a beautiful flavor balance.
You’ll notice how the skillet helps caramelize the edges just right, adding a subtle depth that makes each bite more satisfying. Using this trusty pan isn’t just about tradition; it’s about stepping up your biscuit game with a tool that brings out the best in your dough every time.
Pick the Best Ingredients for Skillet Biscuits
Now that you’ve got your cast iron skillet ready to work its magic, it’s time to focus on the ingredients that’ll make your biscuits truly shine. Start with the best flour you can find. Look for a soft wheat, like a pastry or all-purpose flour, to keep your biscuits tender yet structured.
Skip the generic stuff; quality really shows here. Next, grab some flaky butter, cold and ready to be cut into the flour. This butter creates those irresistible layers and flaky textures you’re aiming for. Don’t settle for margarine or spreadable butter. Real, high-fat butter makes all the difference.
A touch of buttermilk adds tang and tenderness, rounding out your flavor profile. With these simple, top-notch ingredients, you’re setting yourself up for biscuit perfection in that skillet.
Prepare Biscuit Dough Step-by-Step
First, gather all the essential ingredients so you’re ready to roll. Then, mix everything just right, but don’t overwork the dough or your biscuits will turn tough.
Finally, chill the dough before baking to help those flaky layers come out perfect.
Gather Essential Ingredients
You’ll usually find that the best biscuits start with simple, high-quality ingredients you likely already have in your kitchen. When gathering your essentials, focus on pantry staples like all-purpose flour, baking powder, salt, and a bit of sugar to balance flavors.
Don’t forget cold butter or shortening. It’s key for that flaky texture. Milk or buttermilk rounds out the list, adding moisture and tang.
Sticking to these basics not only keeps your biscuit game strong but also helps with grocery budgeting, saving you money by using what’s already on hand or easily found. Before you start mixing, double-check your pantry to avoid unnecessary trips. Having everything ready makes the process smoother and more enjoyable.
Mix Ingredients Properly
How exactly do you turn those simple ingredients into a fluffy, mouthwatering biscuit dough? It all starts with the right mixing technique and perfect flour ratios. First, combine your dry ingredients gently to avoid overworking the flour.
Then, cut cold butter into the mix until it resembles coarse crumbs. This is key for flaky layers. Add your liquid ingredients gradually, folding the dough carefully rather than stirring vigorously.
Remember, the dough should be slightly sticky but manageable.
Use a light hand when mixing to keep biscuits tender
Stick to recommended flour ratios for balance
Keep butter cold and cut into small pieces
Avoid overmixing to prevent toughness
Mastering these steps ensures your biscuit dough will rise and bake beautifully in your cast iron skillet.
Chill Dough Before Baking
While it might be tempting to skip this step, chilling your biscuit dough before baking makes all the difference in achieving those tender, flaky layers you’re aiming for. Dough chilling firms up the butter, preventing it from melting too quickly in the oven and creating those irresistible flaky pockets.
After mixing, wrap your dough tightly in plastic wrap and pop it in the fridge for at least 30 minutes. This resting dough phase not only cools the butter but also allows the flour to hydrate fully, resulting in a better texture.
When you’re ready, your dough will be easier to handle and cut, making the baking process smoother. Trust me taking this little pause transforms your biscuits from good to truly mouthwatering.
Prepare Your Cast Iron Skillet for Baking
Before you pop your biscuits in the oven, make sure your cast iron skillet is seasoned just right to prevent sticking and add flavor. Get it nice and hot by preheating it properly, so your biscuits bake evenly with that perfect golden crust.
And don’t forget the cleanup. Knowing how to care for your skillet keeps it ready for many delicious batches to come.
Seasoning Your Skillet
A well-seasoned cast iron skillet is your secret weapon for baking perfect biscuits with a golden, crispy crust. Seasoning skillet properly creates a natural non-stick surface, making your biscuits come out effortlessly and enhancing the skillet’s lifespan.
To nail cast iron care and keep it in top shape, follow these tips:
- Clean your skillet gently with hot water and a brush; avoid soap to preserve seasoning.
- Dry it thoroughly to prevent rust.
- Apply a thin layer of vegetable oil or flaxseed oil all over the skillet.
- Heat it upside down in the oven at 375°F for about an hour to bond the oil to the iron.
This simple routine will give your skillet that smooth, well-seasoned finish every time.
Preheating Techniques
How hot should your cast iron skillet be before you drop in the biscuit dough? Aim for a preheating temperature around 400°F to 425°F. This range ensures the skillet is hot enough to create a golden, crispy crust while cooking the biscuits evenly inside.
Place your oven rack in the middle position to promote balanced heat circulation, preventing hot spots or burnt bottoms. Preheat the skillet in the oven for at least 10-15 minutes so it’s thoroughly heated.
When you carefully add the biscuit dough, you’ll hear that satisfying sizzle, signaling the perfect start to flaky biscuits. Remember, don’t skip this step; a well-preheated skillet is the secret to baking biscuits that are beautifully risen and irresistibly tender.
Proper Cleaning Methods
Wondering how to get your cast iron skillet ready for baking biscuits? Proper cleaning methods are key to preserving its non-stick surface and enhancing flavor over time. Skip soap and harsh scrubbing; instead, follow these simple steps to maintain your skillet’s seasoning routines:
Rinse with hot water immediately after use to remove crumbs. Use a stiff brush or a non-metal scraper to tackle stubborn bits.
Dry thoroughly on low heat to prevent rust. Lightly coat with oil while the skillet is still warm to keep the seasoning intact.
Shape and Arrange Skillet Biscuits
Where do you start once your dough is ready? First, lightly flour your surface and gently pat the dough into a thick rectangle. To shape biscuits, use a sharp biscuit cutter or a floured glass to press straight down. No twisting, or you’ll seal the edges and they won’t rise properly. Gather any scraps, gently press them together, and cut more biscuits until your dough’s used up.
Next, it’s time to arrange pan. Grease your cast iron skillet with butter or oil to keep the biscuits from sticking and to add flavor. Place the biscuits snugly side-by-side in the pan; this close arrangement helps them rise tall and stay soft on the sides. Give each biscuit just enough room to expand, and you’re all set for the next step!
Baking Time for Cast Iron Skillet Biscuits
When should you pull those golden beauties from the oven? Timing is everything when baking biscuits in your cast iron skillet. The casting technique of your skillet helps distribute heat evenly, but you still need to watch the oven temperature closely.
Typically, you’ll bake your biscuits at 425°F (220°C) for about 12-15 minutes. Look for these signs to know it’s time to take them out:
- The tops are a rich golden brown.
- The edges start to slightly pull away from the skillet.
- A toothpick inserted in the center comes out clean.
- The biscuits have risen nicely and feel firm to the touch.
Keep a close eye during the last few minutes to avoid overbaking and enjoy perfectly tender, fluffy biscuits every time!
Tips for a Crispy, Golden Skillet Biscuit Crust
How do you get that irresistible crispy, golden crust on your skillet biscuits every time? First, preheat your cast iron skillet thoroughly. This ensures the bottom starts cooking immediately, locking in that crispy crust.
Next, don’t skimp on the fat; a little melted butter or oil in the pan creates a beautiful golden texture as it bakes. When you place your biscuit dough in the skillet, give them enough room to expand without sticking.
Avoid opening the oven too soon, or you’ll risk losing that perfect crust. Finally, once out of the oven, brush the tops with melted butter for extra shine and flavor.
These simple tips will have you enjoying skillet biscuits with a crispy crust and golden texture every single time!
Skillet Biscuit Baking Mistakes to Avoid
Why do some skillet biscuits turn out dense or unevenly cooked? It usually boils down to a few common slip-ups. Avoid these mistakes to dodge unwanted side effects like soggy centers or burnt edges.
First, don’t overcrowd your skillet; biscuits need room to rise and crisp evenly. Second, skip underheating the pan. Too cool, and you risk uneven cooking. Third, be wary of overmixing the dough; it can toughen your biscuits. Lastly, don’t ignore safety considerations. Cast iron gets seriously hot, so always use oven mitts and handle with care.
- Crowding biscuits too close
- Starting with a cold skillet
- Overworking the dough
- Neglecting heat safety measures
Avoiding these will help you bake fluffy, golden skillet biscuits every time!
Creative Variations and Add-Ins for Skillet Biscuits
Ready to take your skillet biscuits to the next level? Adding creative variations and mix-ins can transform your classic biscuits into something unforgettable. Whether you want a savory or sweet twist, incorporating add ins like herbs, cheese, or fruits will elevate the flavor and texture.
Here are a few tasty ideas to inspire your next batch:
| Creative Variations | Suggested Add-Ins |
|---|---|
| Cheesy Jalapeño Biscuits | Shredded cheddar, jalapeños |
| Herb-Infused Biscuits | Rosemary, thyme, chives |
| Sweet Cinnamon Biscuits | Cinnamon, brown sugar, raisins |
Feel free to experiment with these or mix your favorite ingredients. Your cast iron skillet biscuits will be bursting with flavor every time!
Frequently Asked Questions
Can I Use a Non-Stick Skillet Instead of Cast Iron?
You can totally use a non-stick skillet instead of cast iron; it works fine for biscuit baking. While it lacks cast iron’s heat retention, the non-stick feasibility makes it a convenient skillet alternative for easy cleanup.
How Do I Store Leftover Biscuits to Keep Them Fresh?
You’d think leftover biscuits could survive a hurricane, but for biscuit freshness, wrap them tightly in foil or plastic wrap and stash them in an airtight container.
Refrigerate if you’re keeping them more than two days!
Are There Gluten-Free Options for Skillet Biscuits?
You can totally make gluten-free skillet biscuits by swapping regular flour for gluten free flour and using dairy free butter. They’ll still come out fluffy and golden, perfect for anyone avoiding gluten or dairy!
Can I Freeze the Biscuit Dough Before Baking?
You can totally freeze dough! Just shape your make ahead dough into biscuits, freeze them on a tray, then store in a bag.
When ready, bake straight from frozen. It’s super convenient for quick, fresh biscuits anytime you want!
What Drinks Pair Best With Cast Iron Skillet Biscuits?
When it comes to pairing wines, you can’t go wrong with a crisp Chardonnay or light Pinot Noir alongside your biscuits.
Add some honey butter or jam as side dishes to really knock it out of the park!
Conclusion
Now, picture pulling that skillet from the oven—the golden biscuits puffed up, crust crackling gently under your fingertips. That buttery aroma wraps around you, promising warmth and comfort with every bite. You’ve nailed the perfect balance of crispy edges and tender centers, all from your trusty cast iron.
Ready to savor that first bite? Go ahead—because once you taste these skillet biscuits, you’ll never want to bake any other way. Making biscuits in a cast iron skillet brings out flavors and textures you simply can’t achieve with other methods.