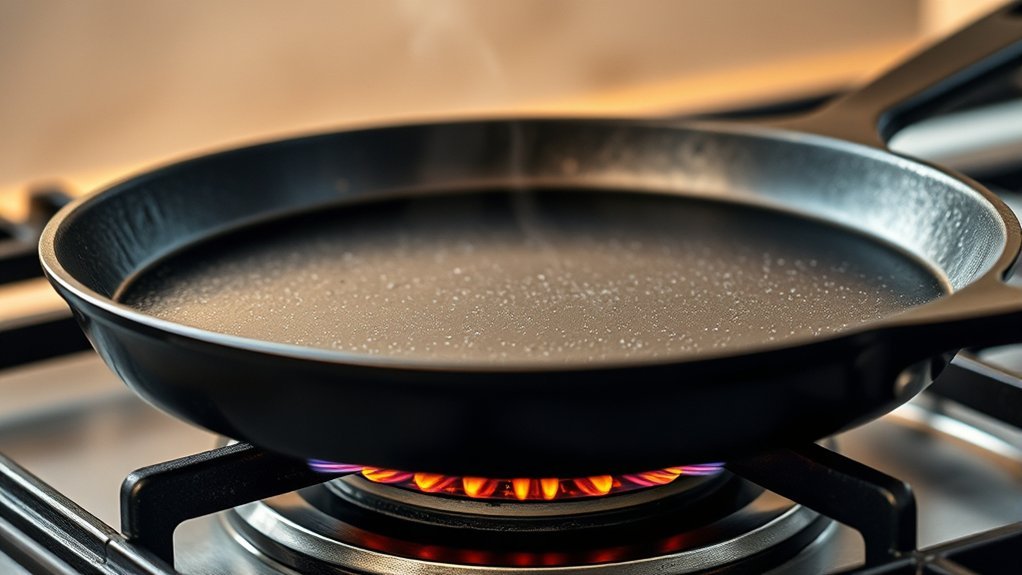
When you preheat a griddle, the first step is ensuring its surface is clean and lightly oiled with a high-smoke-point oil to prevent sticking.
Next, set the burner to medium-high and allow the griddle to warm evenly for about five minutes.
It’s important to monitor the temperature across different spots to avoid hot zones and ensure consistent cooking.
But knowing the right temperature and timing requires more than just a guess—there’s a method to get it just right.
Key Takeaways
- Clean the griddle surface thoroughly to remove food residue and apply a thin layer of high-smoke-point oil.
- Set the burner to medium-high heat to gradually raise the temperature and avoid overheating.
- Allow the griddle to warm for several minutes until the temperature stabilizes evenly across the surface.
- Use an infrared thermometer to check multiple points for uniform heat distribution, preventing hot spots.
- Adjust heat as needed to maintain consistent preheating and prepare the griddle for optimal cooking performance.
Why You Should Always Preheat Your Griddle
Why is it essential to always preheat your griddle before cooking? Preheating ensures even heat distribution across the surface, preventing hot spots and cold areas that compromise cooking quality.
You might encounter preheating myths suggesting it’s unnecessary or only for certain foods, but skipping this step leads to inconsistent results and longer cook times. When you preheat properly, the griddle reaches a stable temperature, allowing food to sear quickly and lock in moisture.
This also minimizes sticking, as the surface forms a natural non-stick layer when heated evenly. To achieve optimal heat distribution, let the griddle warm up for several minutes until the temperature stabilizes.
This technical step is crucial for consistent, professional-level cooking every time you use your griddle.
How to Clean Your Griddle Before You Preheat
Before you preheat your griddle, remove all food residue using a scraper or grill brush designed for your surface. Select cleaning tools that won’t damage the griddle’s finish to maintain its integrity.
Finally, apply a thin layer of oil to protect the surface and ensure even heating.
Remove Food Residue
How do you ensure your griddle heats evenly and performs at its best? Start by removing all griddle residue before preheating. Stuck-on food disrupts heat distribution and affects flavor.
Establish a cleaning rhythm. Wipe the surface immediately after each use. This prevents buildup and simplifies maintenance.
| Step | Action | Purpose |
|---|---|---|
| 1 | Scrape off loose debris | Remove large particles |
| 2 | Wipe with damp cloth | Eliminate grease and residue |
| 3 | Inspect for stubborn spots | Ensure surface uniformity |
| 4 | Repeat as needed | Maintain a clean cooking surface |
Follow this process consistently to optimize your griddle’s performance and durability.
Choose Appropriate Cleaning Tools
Selecting the right cleaning tools is essential to maintain your griddle’s surface and ensure even heating. Start with a non-abrasive scraper designed specifically for griddles to remove stubborn food residues without damaging the surface.
Next, use a griddle brush with stiff, heat-resistant bristles to clear finer particles. Avoid steel wool or harsh scouring pads, as they can scratch and degrade the surface, compromising griddle maintenance.
For wiping, choose lint-free cloths or specialized griddle cleaning pads that won’t leave fibers behind. Ensure all tools are clean and dry before use to prevent contamination.
Proper selection and use of cleaning tools directly affect your griddle’s longevity and performance, so adhere strictly to recommended types to maintain an even heating surface and optimal cooking results.
Apply Oil For Protection
Why is applying oil a pivotal step before preheating your griddle? Oil protection forms a thin barrier that prevents rust and promotes even heat distribution. After cleaning, use a high-smoke-point oil like canola or flaxseed.
Apply a small amount evenly across the surface with a paper towel or cloth, ensuring full coverage without excess pooling. This step supports seasoning relevance by reinforcing the polymerized oil layer that builds over time, enhancing non-stick properties.
Avoid using too much oil; it can create sticky residue. Once oiled, preheat the griddle to the desired temperature to allow the oil to bond to the metal surface. This process not only preserves the griddle’s integrity but also ensures consistent cooking results every time you use it.
Step-by-Step Guide to Preheating Your Griddle
First, make sure you prepare the griddle surface by applying a thin layer of oil to prevent sticking.
Next, adjust the temperature settings according to the type of food you plan to cook.
Following these steps ensures even heating and optimal cooking results.
Preparing the Griddle Surface
Before you heat up your griddle, you’ll want to clean and oil the surface thoroughly to guarantee even cooking and prevent sticking. Begin by wiping down the griddle with a damp cloth to remove any debris or residue.
Next, apply a thin, even layer of high-smoke-point oil using a paper towel, ensuring you cover the entire cooking area. This step smooths out the griddle texture, promoting better heat transfer across preheating surfaces.
Avoid excess oil to prevent buildup during heating. Properly prepared, the griddle surface will heat uniformly, reducing hotspots and improving food release. Taking these precise steps ensures your griddle is primed for efficient preheating, setting a solid foundation for optimal cooking performance.
Temperature Adjustment Techniques
How do you guarantee your griddle reaches the ideal temperature evenly and efficiently? Begin by setting your burner to a medium-high setting, allowing the griddle temperature to rise steadily. Avoid starting on maximum heat to prevent uneven heat distribution and hot spots.
After 5 minutes, use an infrared thermometer to check surface temperature at multiple points. Adjust the burner intensity accordingly, lower if some areas are overheating, or increase if the griddle hasn’t reached your target temperature. Maintain this balance by periodically monitoring heat distribution and making fine adjustments.
This stepwise approach ensures consistent cooking conditions. Remember, patience during preheating optimizes griddle performance, prolongs its lifespan, and guarantees even heat distribution for perfect results every time you cook.
How to Test If Your Griddle Is Hot Enough
When can you be sure your griddle has reached the ideal cooking temperature? Begin by verifying proper griddle placement on your heat source to ensure even heating.
Next, use a reliable infrared thermometer to measure the surface temperature accurately. Aim for a temperature range suited to your cooking needs, typically between 350°F and 400°F for most foods.
For a quick, practical test, sprinkle a few drops of water onto the griddle; if they sizzle and evaporate immediately, the surface is hot enough. Avoid relying solely on visual cues, as they can be misleading.
Regularly perform testing temperature checks during preheating to maintain consistent results. These precise steps guarantee your griddle is properly heated before cooking begins.
Adjusting Preheat Time for Foods and Griddles
Once you confirm your griddle has reached the target temperature, adjust the preheat time based on the type of food and the griddle’s material. Denser foods like thick steaks require a longer preheat duration to maintain consistent heat upon contact.
Conversely, delicate items such as eggs need a shorter preheat time to prevent overcooking. The griddle’s material also influences preheat duration; cast iron demands more time due to its higher heat capacity, while aluminum heats faster and requires less preheating.
Always calibrate your preheat duration by testing with your specific food type to achieve optimal cooking results. Maintaining the correct target temperature throughout ensures even cooking and prevents temperature fluctuations that can affect food quality.
Adjustments should be precise and based on real-time observations.
Mistakes to Avoid When Preheating Your Griddle
Why do so many home cooks overlook critical errors during griddle preheating? Avoid these common mistakes to ensure optimal cooking performance.
First, never skip cleaning your griddle before preheating; residue affects heat distribution. Second, don’t set the temperature too high initially. Gradual heating prevents warping.
Third, avoid uneven heating by allowing sufficient time for the entire surface to reach target temperature. Fourth, don’t ignore your griddle’s material specifications; different metals require varied preheating times.
Lastly, avoid adding oil before the griddle is hot; it can cause sticking.
| Mistake | Preheating Essentials |
|---|---|
| Skipping cleaning | Always clean before preheating |
| Setting too high temp | Increase heat gradually |
| Uneven heating | Allow full surface preheat |
| Ignoring material specs | Adjust time per griddle material |
| Adding oil too early | Oil only after proper preheat |
Frequently Asked Questions
What Types of Griddles Require Preheating?
You’ll need to preheat griddles made of cast iron and stainless steel since their griddle materials require even heat distribution.
Non-stick and aluminum griddles heat faster, so preheating isn’t always necessary for consistent cooking results.
Can I Preheat a Griddle Outdoors?
Yes, you can preheat a griddle outdoors. For effective outdoor preheating, guarantee consistent heat application and monitor temperature closely, especially during cold weather operation. Low temperatures can extend preheating time and affect cooking performance.
How Long Does Preheating Affect Griddle Lifespan?
You should limit preheating duration to 10-15 minutes to optimize griddle longevity. Excessive preheating stresses the metal, accelerating wear and reducing lifespan, so stick to recommended times to maintain performance and durability effectively.
Is Preheating Necessary for Electric vs. Gas Griddles?
You’ll find preheating boosts temperature uniformity by 30% on gas griddles, enhancing cooking efficiency.
Electric griddles need it less, but preheating still improves heating efficiency and consistent heat distribution for better results.
What Safety Precautions Should I Take When Preheating?
You should use heat-resistant gloves when handling heat and keep flammable materials away. Avoid touching the griddle surface directly to prevent burns, and always monitor the temperature to maintain safe preheating conditions.
Conclusion
Preheating your griddle properly primes perfect plates by preventing pesky sticking and promoting even cooking. Always apply a thin, thorough coat of high-smoke-point oil and patiently allow gradual heating at medium-high heat.
Periodically probe with an infrared thermometer to pinpoint consistent temperatures and prevent pitfalls like hot spots or wasted energy. By mastering meticulous maintenance and measured methods, you’ll maximize your griddle’s performance and produce flawlessly fantastic food every time.
In conclusion, understanding how is a griddle preheated is essential to achieving the best cooking results and ensuring your meals come out perfectly every time.