Stripping and reseasoning your Blackstone griddle is essential for maintaining its performance and longevity. Properly stripping and reseasoning your Blackstone griddle helps reset the cooking surface, ensuring even heat distribution and preventing sticking.
If you’ve noticed uneven cooking or sticky residue, it’s time to take action. You’ll need the right tools, safety gear, and a methodical approach to remove old seasoning without damaging the surface.
Understanding these steps ensures your griddle remains reliable and ready for your next cookout. Here’s what you need to know before you start.
Key Takeaways
- Strip the Blackstone griddle when uneven heating, rust, or sticky residue appears using a stainless steel scraper and mild degreasing cleaner.
- Wear heat-resistant gloves, safety goggles, and a respirator mask in a well-ventilated area to ensure safe stripping.
- Clean residue with hot water, mild degreaser, and a stiff nylon brush, then rinse thoroughly and dry immediately to prevent rust.
- Reseason by applying a thin coat of high smoke point oil like flaxseed or grapeseed, then heat at high temperature for 30–60 minutes.
- Repeat seasoning 2–3 times and maintain by wiping warm surface after use and periodically applying a thin oil coat to preserve non-stick properties.
Why and When to Strip Your Blackstone Griddle
Why should you strip your Blackstone griddle? Stripping removes built-up layers of carbonized grease, burnt food, and old seasoning that can trap heavy metal residues and degrade cooking performance. Over time, these contaminants compromise heat distribution and food safety.
You need to strip your griddle when you notice uneven heating, persistent rust, or a sticky, uneven surface that scrubbing tools alone can’t clean effectively. Regular maintenance prevents heavy metal accumulation and ensures a smooth, clean cooking surface.
Stripping also prepares the griddle for reseasoning, which restores its non-stick properties and protects against corrosion. Knowing when to strip keeps your Blackstone griddle functioning optimally and prolongs its lifespan, so don’t wait until performance drops or contamination becomes visible.
What You Need Before Stripping Your Blackstone Griddle
Before stripping your Blackstone griddle, gather essential cleaning supplies like a scraper, degreaser, and steel wool.
You’ll also need protective gear, including gloves and safety glasses, to shield yourself from harsh chemicals and debris. Preparing these items ensures a safe and effective stripping process.
Essential Cleaning Supplies
Gathering the right cleaning supplies guarantees you can effectively strip and reseason your Blackstone griddle without damaging its surface. To maintain nonstick safety and ensure proper ash disposal, you need specific tools designed for durability and precision.
Here’s what to have on hand before you start:
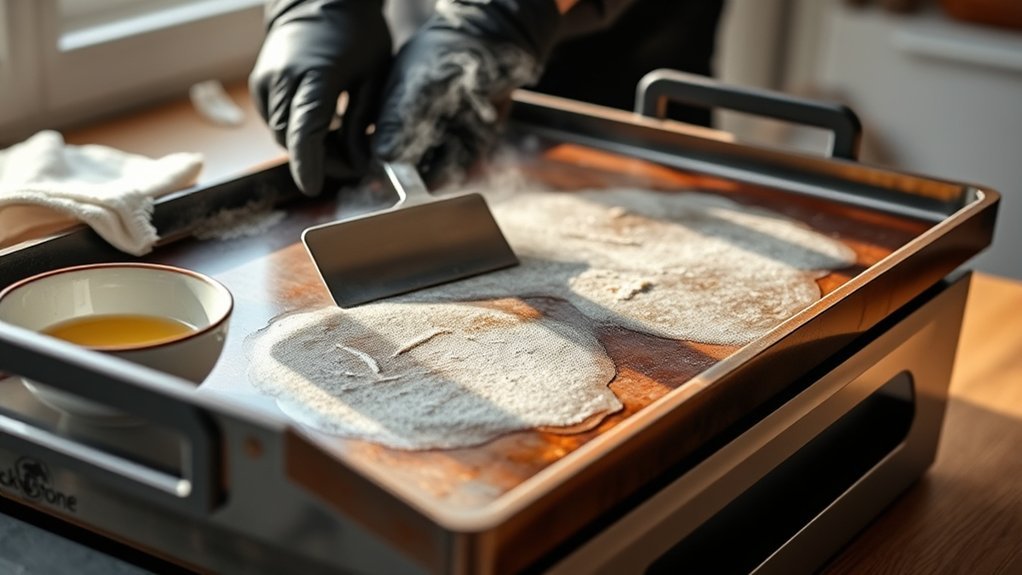
- Stainless steel scraper for removing residue without scratching
- Grill brush with stiff bristles for thorough cleaning
- Heat-resistant gloves to handle hot surfaces safely
- Ash pan or container to collect and dispose of debris properly
These supplies help you manage buildup efficiently, protect the griddle’s surface, and maintain a safe cooking environment. Using improper tools risks scratching or uneven seasoning, compromising nonstick safety. Always prepare these essentials to streamline your stripping and reseasoning process.
Protective Gear Needed
Along with having the right cleaning supplies, you’ll want to equip yourself with proper protective gear to safely strip your Blackstone griddle. Start with heat-resistant gloves to protect your hands from burns and chemical exposure during the stripping process.
Safety goggles are essential to shield your eyes from splashes of cleaning agents or debris. Wear a long-sleeve shirt and durable apron to prevent skin contact with harsh chemicals.
A respirator mask helps you avoid inhaling fumes from solvents and degreasers. Always follow established safety guidelines by working in a well-ventilated area and keeping a fire extinguisher nearby.
Wearing the correct protective gear reduces injury risk and ensures a controlled stripping process, setting a safe foundation for reseasoning your Blackstone griddle effectively.
Safely Stripping Old Seasoning From Your Blackstone Griddle
You’ll need to select cleaning methods that effectively remove old seasoning without damaging your Blackstone griddle. Start by preparing the surface properly to assure even stripping and prevent buildup.
Then, manage residue and debris carefully to maintain a clean, safe workspace throughout the process.
Choosing Safe Cleaning Methods
Selecting the right cleaning method is essential when stripping the old seasoning from your Blackstone griddle to prevent damage and guarantee a smooth reseasoning process. You want to maintain griddle durability while effectively removing buildup without harming the nonstick coating.
Choose methods that:
- Use gentle abrasives like steel wool or a griddle scraper to avoid deep scratches.
- Avoid harsh chemicals that can degrade the seasoning layer and compromise safety.
- Employ heat-assisted cleaning to loosen residue without excessive force.
- Minimize water exposure to prevent rust and preserve the steel surface.
Preparing The Griddle Surface
How do you safely strip old seasoning from your Blackstone griddle without damaging its surface? Begin by heating the griddle to loosen the existing seasoning, then turn off the heat to avoid warping. Use a scraper or abrasive pad designed specifically for Blackstone surfaces. Avoid unrelated topics like harsh chemicals or metal brushes that can cause scratches.
Focus on two word ideas such as “surface integrity” and “controlled abrasion” to guide your process. Work methodically in small sections, applying consistent pressure to prevent gouges. Always wear heat-resistant gloves and ensure proper ventilation to protect yourself.
Handling Residue And Debris
Once the old seasoning has been loosened through controlled abrasion, managing the resulting residue and debris becomes the next priority. Effective residue handling and debris management ensures a clean surface, ready for reseasoning without damage or contamination.
Follow these steps:
- Use a metal scraper or grill spatula to remove loose flakes and buildup.
- Employ a stiff nylon brush to sweep away finer particles.
- Wipe the surface with a damp cloth to capture remaining dust.
- Dispose of all residue safely, avoiding environmental hazards.
Avoid water pooling to prevent rust during residue handling. Consistent debris management not only protects your Blackstone griddle but also optimizes seasoning adhesion.
Cleaning Your Blackstone Griddle After Stripping Residue
Why is thorough cleaning essential after stripping residue from your Blackstone griddle? Removing all loosened debris and residual oils prevents contamination and ensures an even surface for seasoning.
Thorough cleaning removes debris and oils, preventing contamination and ensuring an even surface for perfect seasoning.
Start by scraping loose particles with a metal spatula. Then, apply hot water mixed with a mild degreaser; avoid harsh chemicals that could damage the steel.
Use a stiff nylon brush to scrub stubborn spots, focusing on two word discussion ideas like “grease removal” and “surface prep” to stay precise. Rinse thoroughly to eliminate cleaning agents, then dry immediately with a clean cloth to prevent rust.
This subtopic not relevant to other h2s emphasizes the importance of a clean slate, ensuring your griddle’s longevity and optimal cooking performance before moving on to reseasoning.
Preparing Your Griddle Surface for Reseasoning
You need to thoroughly clean off any remaining residue and old seasoning to guarantee a smooth, bare surface. Use a scraper and a degreaser to remove buildup completely.
Once clean, dry the griddle surface thoroughly to prevent rust before applying new seasoning.
Cleaning Off Residue
A thorough cleaning removes built-up residue and prepares your Blackstone griddle for effective reseasoning. Start by scraping off any loose debris with a metal spatula.
Next, use a griddle scraper or abrasive pad to tackle stubborn residue without damaging the surface. Apply cleaning tips like using warm water and a non-abrasive cleaner to avoid corrosion.
Finally, polish the surface with appropriate polishing tools to restore smoothness.
- Scrape loose debris with a metal spatula
- Use abrasive pads for stuck-on residue
- Clean with warm water and non-abrasive cleaners
- Polish surface using specialized polishing tools
Following these steps ensures your griddle is residue-free, enabling optimal seasoning adhesion and longevity.
Removing Old Seasoning
Once the griddle is free of debris and residue, focus shifts to removing the old seasoning layer. Use a high-heat burn-off method by heating the griddle until the seasoning blisters and peels, then scrape it off with a metal spatula.
Alternatively, apply a commercial oven cleaner designed for heavy-duty degreasing. Follow all safety considerations strictly, including gloves and ventilation.
For stubborn buildup, alternative methods like using a mixture of vinegar and water or coarse salt scrubbing can help, but these may require multiple applications. Avoid abrasive tools that can damage the steel surface.
Proper removal of the old seasoning ensures an even, clean base for reseasoning. Always prioritize safety considerations to protect yourself from harmful fumes and chemical exposure during this process.
Drying The Surface
How thoroughly you dry the griddle surface directly impacts the success of your reseasoning process. Effective moisture control prevents rust and guarantees the oil bonds properly during seasoning. After stripping the old layer, focus on eliminating all residual moisture.
Follow these steps to optimize drying surface preparation:
- Wipe the griddle with clean, dry cloths to absorb visible water.
- Heat the griddle on medium to high for 10–15 minutes, allowing evaporation of trapped moisture.
- Use a fan or open airflow around the griddle to accelerate drying.
- Verify the surface is completely dry by touching it; no dampness should remain.
Mastering moisture control during drying sets the foundation for a durable, even seasoning layer on your Blackstone griddle.
Choosing the Best Oils for Your Blackstone Griddle
Several oils stand out for their high smoke points and ability to create a durable, non-stick surface on your Blackstone griddle. Choose oils like flaxseed, grapeseed, or avocado oil, as they withstand high temperatures without breaking down.
These oils polymerize effectively, minimizing discoloration patterns that indicate uneven seasoning or overheating. Proper oil selection also supports consistent heat distribution, essential for a uniform cooking surface.
Avoid low smoke point oils like olive or butter, which can burn and cause sticky residues. Using the right oil ensures a robust seasoning layer that resists wear and enhances performance.
Step-by-Step Guide to Reseasoning Your Blackstone Griddle
Selecting the right oil lays the foundation for effective seasoning, but applying it correctly is what builds a resilient cooking surface. Begin by thoroughly cleaning your griddle, following proper cleanup routines to remove residue. Next, preheat the griddle to open the pores of the metal, allowing oil to bond deeply.
Apply a thin, even coat of your chosen oil, using a cloth or brush to avoid excess buildup. Then, polymerize the oil by heating the griddle at high temperature for about 30-60 minutes. Repeat this process 2-3 times to ensure durability.
- Clean surface thoroughly before seasoning
- Preheat griddle to optimal temperature
- Apply thin oil layers evenly
- Heat to polymerize and build layers
This method enhances non-stick properties and supports diverse flavor ideas.
How to Maintain Your Blackstone Griddle Seasoning
Although seasoning your Blackstone griddle creates a strong, non-stick surface, maintaining that seasoning requires consistent care and proper cleaning techniques. After each use, employ the two word idea 1 method by wiping down the surface with a paper towel while it’s still warm, removing food residue without damaging the seasoning layer. Avoid harsh detergents; instead, use a scraper or spatula for stuck-on debris.
Periodically, apply a thin coat of oil two word idea 2 to the griddle while it’s warm. This replenishes the protective layer and prevents rust formation. Store your griddle covered and dry to minimize exposure to moisture.
Troubleshooting Common Blackstone Griddle Seasoning Issues
Common seasoning issues on your Blackstone griddle can hinder cooking performance and longevity. Addressing these problems early ensures even heat distribution and prevents carbon buildup that degrades the cooking surface.
Watch for these common issues:
- Uneven seasoning patches: Causes hot and cold spots; reapply thin oil layers and heat evenly.
- Sticky or gummy surface: Results from excess oil; strip and reseason to restore smoothness.
- Flaking or peeling seasoning: Indicates poor initial seasoning or contamination; clean thoroughly before reseasoning.
- Carbon buildup: Hardened residue impairs heat transfer; use a scraper or steel wool to remove it without damaging the metal.
When to Strip and Reseason Your Blackstone Griddle Again
How do you know when it’s time to strip and reseason your Blackstone griddle again? Monitor the cooking surface for rust, uneven seasoning, or persistent food sticking, signs that the protective layer has degraded.
Watch for rust, uneven seasoning, or stubborn food sticking—clear signs it’s time to strip and reseason your Blackstone griddle.
If you notice discoloration or the griddle feels rough, it’s time to act. Regular maintenance prevents costly repairs, aligning with budget travel principles by extending your griddle’s lifespan and avoiding unnecessary replacements.
Additionally, if you use the griddle near pets, ensure the seasoning remains intact to prevent harmful residue exposure. Frequent heavy use or exposure to moisture accelerates wear, prompting earlier reseasoning.
Schedule stripping and reseasoning based on usage intensity and environmental factors rather than a fixed timeline, ensuring optimal performance and safety every time you cook.
Frequently Asked Questions
Can I Use a Dishwasher to Clean My Blackstone Griddle?
You shouldn’t use a dishwasher for cleaning your Blackstone griddle due to dishwasher safety concerns. Instead, perform indoor stripping with appropriate solvents and tools to protect the seasoning and maintain the griddle’s surface integrity.
Is It Safe to Strip Seasoning Indoors?
Yes, you can strip indoors if you ensure proper ventilation safety by opening windows and using fans. This prevents harmful fumes buildup.
Always wear protective gear, and never ignore ventilation when striping indoors to maintain a safe environment.
How Long Does the Reseasoning Process Take?
The reseasoning process typically takes about 1-2 hours, but timing variability depends on your heat source and oil type.
You’ll find seasoning speed improves with experience, ensuring a durable, non-stick surface every time you reseason.
Can I Use Cooking Sprays on My Blackstone Griddle?
You shouldn’t use cooking sprays on your Blackstone griddle; they can cause buildup and uneven seasoning. Instead, focus on proper heat management and regular oiling to avoid sticking and maintain a durable, nonstick surface.
What Should I Do if My Griddle Rusts After Reseasoning?
If rust appears, act like a blacksmith. Scrape it off, clean thoroughly, then reseason immediately.
Maintain rust prevention by regularly oiling and storing your griddle properly. Consistent maintenance habits keep your surface reliable and rust-free.
Conclusion
Stripping and reseasoning your Blackstone griddle isn’t just maintenance—it’s like giving your cooking surface a fresh coat of armor. By following precise cleaning and seasoning steps, you’ll restore its non-stick performance and prolong its life.
Remember, patience during seasoning cycles guarantees a durable, even coating. With proper care, your griddle will stay ready for countless delicious meals, turning every cookout into a flawless, sizzling success.
Keep it sharp, keep it seasoned. Proper stripping and reseasoning of your Blackstone griddle ensures it remains in top condition for years to come.